Pay in installments of $6.75 with
 ,
,
 and
and

Shipping Estimate
USA
- USA
- CAN
- USA
- CAN
Ships within 48 hours · Estimated delivery Aug 3 - Aug 8
 Promo Codes Available:
For Your Every Summer RSVP, with Code: SUMMER15
Description
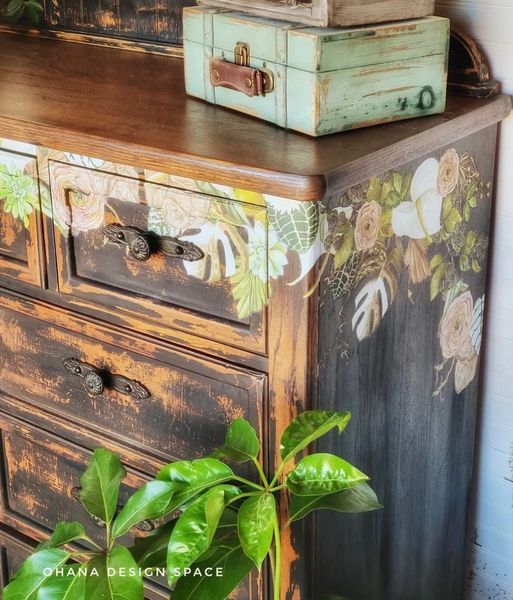
anthurium transfer Anthurium (61 x 89cm)Applying Redesign Dco Transfers is truly child's play. We'll explain how it works below. STEP 1Prepare the surface where you want to apply the transfer. Sand it smooth with some sandpaper if necessary, and ensure the surface is free of dust and grease. STEP 2 Determine exactly where you want the transfer and cut out any necessary sections. Don't remove the protective film yet, and be careful not to get any unwanted parts of the transfer stuck to
Applying Redesign Déco Transfers is truly child's play. We'll explain how it works below.
STEP 1
Prepare the surface where you want to apply the transfer. Sand it smooth with some sandpaper if necessary, and ensure the surface is free of dust and grease.
STEP 2
Determine exactly where you want the transfer and cut out any necessary sections. Don't remove the protective film yet, and be careful not to get any unwanted parts of the transfer stuck to unwanted areas. This will make it difficult—almost impossible—to remove.
Especially when you cut out pieces of transfer paper and want to stick them next to and on top of each other, it's helpful to tape the cut-out pieces, with the protective film still attached, to your furniture with some masking tape. This way, you get a good overview of your design and can continue to build your "puzzle."
You can layer multiple pieces of transfer material on top of each other. Where the designs overlap, the bottom design will no longer be visible. Partially overlapping the pieces creates more depth in the design.
STEP 3
Once you're happy with where you want each piece or the entire transfer to be, remove the pieces with the masking tape. Remove the protective film one by one and then apply the transfer, adhesive side down, to the desired locations. Try to do this as evenly and smoothly as possible to avoid creating bubbles.
STEP 4
With the supplied stick (or Using the transfer tool , rub the transfer onto the furniture. Place the stick, with the long side facing upward, at an angle of about 45 degrees to the back of the transfer. By rubbing and applying pressure, the image will gradually transfer from the film to the furniture. The principle is similar to that of a temporary tattoo.
It's easiest to work slowly from left to right, or vice versa. Each time you complete a section, gently pull the backing film upward to check if the design has been transferred properly. If not, replace the film over the design and continue rubbing with the stick. Gradually work your way to the right until the image is completely transferred.
And you're done...!
Shipping Notes
- Free Standard Shipping on $100+ Orders to the USA.
- Except Preorder products are shipped in 48 hours.
- Delivery to the USA:
- Standard Shipping : 3-10 business days
- If time is of the essence, please consider selecting expedited delivery for faster service.
Exchange/Return Notes
- We offer a 30-day return/exchange service after receiving.
- Final sale items are not eligible for returns or exchanges.
- To process your return/exchange, please contact us at [email protected]
- Please click here for more details>>> Return & Exchange Policy