Pay in installments of $6.72 with
 ,
,
 and
and

Shipping Estimate
USA
- USA
- CAN
- USA
- CAN
Ships within 48 hours · Estimated delivery Aug 1 - Aug 6
 Promo Codes Available:
For Your Every Summer RSVP, with Code: SUMMER15
Description
planting lavender in arizona Buy Spanish Lavender Phoenix, AZ | Lavandula stoechasThe Best Fragrant Purple Perennial for Phoenix Gardens Spanish Lavender (Lavandula stoechas) is the most eye catching lavender you can grow in the Phoenix Valley. Unlike English lavender, this Mediterranean native thrives in Arizona's alkaline soils and blazing heat, producing distinctive deep purple flower heads topped with showy petal like bracts from late winter through spring. Compact at just 1824 inches tall, it fills the garden with a rich
The Best Fragrant Purple Perennial for Phoenix Gardens
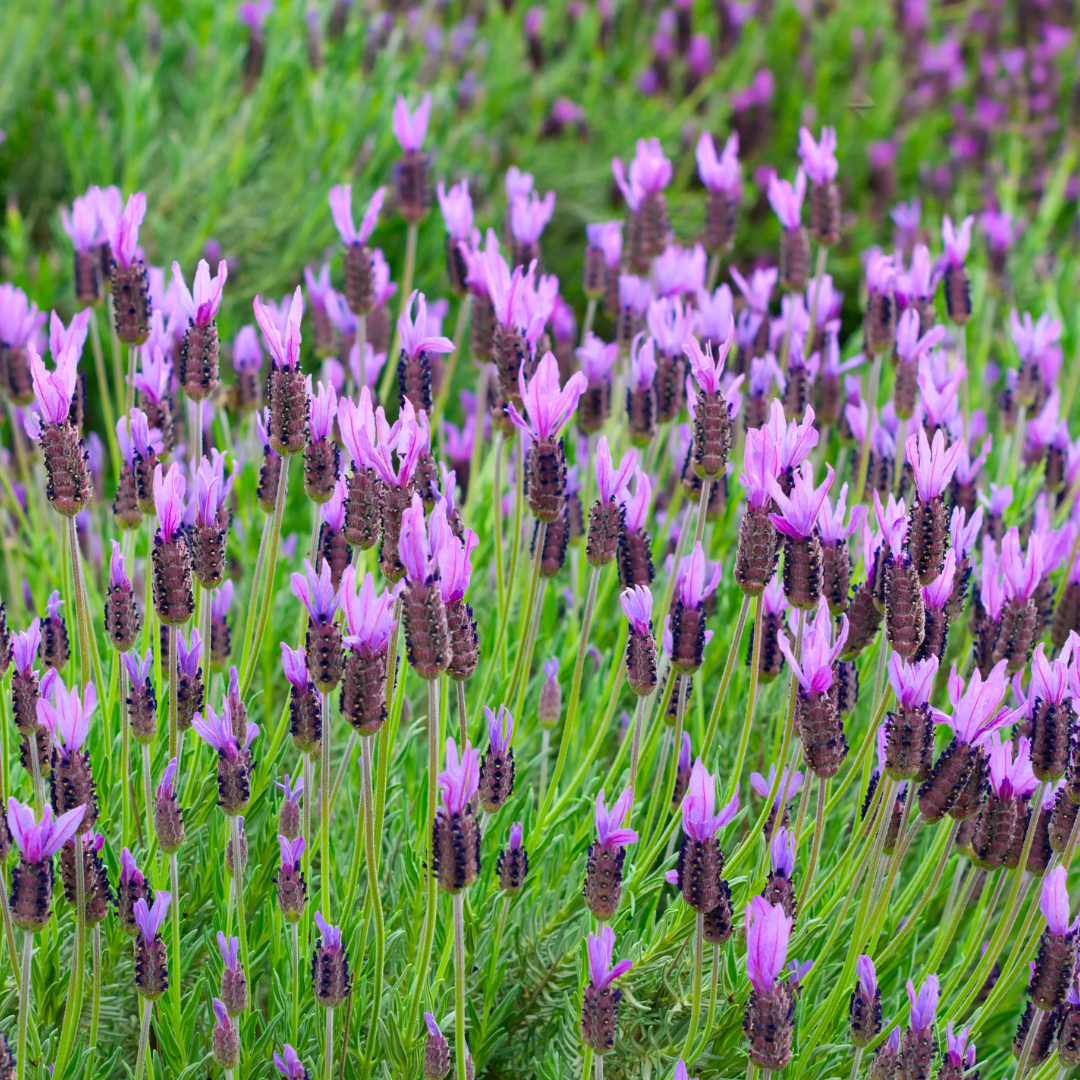
Spanish Lavender (Lavandula stoechas) is the most eye-catching lavender you can grow in the Phoenix Valley. Unlike English lavender, this Mediterranean native thrives in Arizona's alkaline soils and blazing heat, producing distinctive deep purple flower heads topped with showy petal-like bracts from late winter through spring. Compact at just 18–24 inches tall, it fills the garden with a rich herbal fragrance while attracting bees, butterflies, and hummingbirds. Whether you're planting a fragrant border in Scottsdale, a pollinator garden in Chandler, or a low-water cottage bed in Mesa — Spanish Lavender is a top performer.
Spanish Lavender Plant Details
| Attribute | Detail |
|---|---|
| Scientific Name | Lavandula stoechas |
| Common Names | Spanish Lavender, Butterfly Lavender, Topped Lavender |
| Mature Height | 18–24 inches |
| Mature Width | 18–24 inches |
| Growth Rate | Fast — fills out within one growing season in Phoenix |
| Sun | Full sun (6+ hrs). Handles reflected heat from walls. |
| Water | Low once established. Drought-tolerant. |
| USDA Zones | 7–10 (Phoenix is Zone 9b–10a) |
| Soil | Well-draining. Thrives in Arizona caliche and alkaline soils. |
| Foliage | Evergreen — aromatic silver-green foliage year-round |
| Bloom | Deep purple flower heads with showy bracts, late winter–spring |
Spanish Lavender Uses in Phoenix Landscapes
Fragrant Borders & Edging
Spanish Lavender's compact, mounding habit makes it a natural choice for garden borders and pathway edging. Plant 18–24 inches apart for a dense, fragrant border that blooms heavily in spring. Line a walkway or driveway for a stunning seasonal display that perfumes the air.
Pollinator & Butterfly Gardens
The distinctive topped flower heads are a magnet for bees, butterflies, and hummingbirds. Combine with other pollinator favorites like Red Yucca, Ruellia, and Lantana for a buzzing wildlife garden throughout Gilbert, Tempe, and Peoria.
Low-Water Mediterranean & Cottage Gardens
Spanish Lavender is a cornerstone plant for Mediterranean-style landscapes in the Phoenix Valley. Pair with Rosemary, Salvia, and ornamental grasses for an aromatic, drought-tolerant garden that evokes a Tuscan hillside — without the water bill.
Container & Patio Planting
Its compact size makes Spanish Lavender ideal for containers on patios, balconies, and courtyards. Place near seating areas to enjoy the fragrance up close.
Best Time to Plant Spanish Lavender in Phoenix
Fall (October–November) is the ideal planting window. Warm soil encourages fast root establishment while cooler air reduces transplant stress, and the plant will bloom its first spring. Spring (February–March) is a good second choice. Avoid planting in peak summer — lavender prefers to establish in cooler conditions.
How to Plant Spanish Lavender
- Dig wide, not deep — 2× the root ball width, same depth
- Check for caliche — break through any hardpan layer for drainage (critical for lavender)
- Backfill with native soil — avoid heavy amendments; lavender prefers lean soil
- Spacing — 18–24 inches apart for a border; 24–30 inches for individual plants
- Water basin — build a shallow ring to direct water to roots during establishment
- Mulch — 2–3 inches of gravel mulch (avoid organic mulch touching the crown to prevent rot)
Watering Spanish Lavender in Phoenix
First Year Watering Schedule
- Weeks 1–2: Every 2–3 days, deep and slow
- Month 1–2: Every 4–5 days
- Month 3–6: Every 7–10 days (5–7 days in peak summer)
- After Year 1: Every 10–14 days in summer; every 3–4 weeks in winter
Drip Irrigation
Place one 1 GPH emitter 6–8 inches from the crown. Overwatering is the #1 killer of lavender — ensure soil dries between waterings. Established plants need very little supplemental water.
How fast does Spanish Lavender grow in Phoenix?
Spanish Lavender grows quickly, filling out to its mature size within one growing season. Expect flowers by the first spring after planting.
Is Spanish Lavender drought tolerant?
Yes — once established, Spanish Lavender is highly drought-tolerant and actually prefers drier conditions. Overwatering causes more problems than underwatering.
What's the difference between Spanish and English Lavender?
Spanish Lavender (Lavandula stoechas) has distinctive topped flower bracts and handles heat and alkaline soils much better than English Lavender (Lavandula angustifolia). For Phoenix gardens, Spanish Lavender is the far better choice.
Does Spanish Lavender attract pollinators?
Absolutely — it's one of the best pollinator plants for Phoenix gardens, attracting bees, butterflies, and hummingbirds throughout its bloom season.
You May Also Like
- Texas Sage — Purple-flowering drought-tolerant shrub, blooms after summer rains
- Ruellia — Purple trumpet flowers all summer, tough as nails
- Red Yucca — Coral flower spikes that hummingbirds love
- Trailing Lantana — Colorful groundcover that pairs beautifully with lavender
- Rosemary — Another fragrant Mediterranean herb perfect for Phoenix
How Many Spanish Lavender Do I Need?
Spanish Lavender stays compact at 18 to 24 inches wide, so it shines as a fragrant ribbon along walkways, driveways, and bed edges. For a continuous border, space plants about 20 inches on center. Use this guide:
| Border Length | Plants Needed (20 in spacing) |
|---|---|
| 5 ft | 4 plants |
| 10 ft | 7 plants |
| 15 ft | 10 plants |
| 20 ft | 13 plants |
For specimen clumps in a cottage or pollinator bed, plant in odd-numbered groups of 3 to 5 spaced 24 inches apart so each mound reads as a distinct cushion of silver foliage and purple bloom.
Spanish Lavender Season-by-Season in Phoenix
- Spring (Feb to Apr): Peak season. Deep purple topped flower heads cover the plant and draw bees, butterflies, and hummingbirds. This is also a fine second planting window once frost danger passes.
- Summer (May to Sep): Handles full Valley heat and reflected heat off walls and paving once established. Bloom slows in the hottest months. Keep soil on the dry side and let it dry fully between waterings, since summer overwatering plus heat is the main cause of root rot.
- Fall (Oct to Nov): Prime planting season. Cooler air and warm soil let new plants root in fast for a strong first-spring bloom. A light shearing now keeps the mound tidy.
- Winter (Dec to Jan): Evergreen aromatic foliage holds through the season and gives structure. Cold-hardy well below typical Valley lows, so no frost protection is needed in Phoenix.
At a Glance
✔ Pollinator-Friendly ✔ Hummingbird-Friendly ✔ Heat-Loving (Reflected-Heat Tolerant) ✔ Drought-Tolerant ✔ Evergreen ✔ Low-Maintenance ✔ Deer & Rabbit-Resistant ✔ Cold-Hardy to 15°F
Plant It With
- Rosemary 'Tuscan Blue': another fragrant Mediterranean herb that loves the same lean, dry, sunny conditions.
- Texas Sage: a purple-flowering desert shrub that backs the low lavender border with height.
- Desert Ruellia: purple trumpet blooms and tough heat tolerance for a coordinated color palette.
- Red Yucca: coral flower spikes that add vertical accent and keep hummingbirds coming.
Is Spanish Lavender Right for Your Yard?
Spanish Lavender thrives in full sun and reflected heat, in fast-draining or caliche soil where water never sits, and it asks for very little once established. It is ideal for fragrant borders, cottage beds, and low-water Mediterranean gardens across the Valley. It is not a fit if your bed stays wet or has heavy clay that holds water, since soggy roots are the one thing this plant will not tolerate.
Shipping Notes
- Free Standard Shipping on $100+ Orders to the USA.
- Except Preorder products are shipped in 48 hours.
- Delivery to the USA:
- Standard Shipping : 3-10 business days
- If time is of the essence, please consider selecting expedited delivery for faster service.
Exchange/Return Notes
- We offer a 30-day return/exchange service after receiving.
- Final sale items are not eligible for returns or exchanges.
- To process your return/exchange, please contact us at [email protected]
- Please click here for more details>>> Return & Exchange Policy